Showing posts with label Cookies. Show all posts
Wednesday, September 3, 2014

Chocolate Chip Cookies - Finally.


How is it possible?  In 4 years of writing this blog I have never posted a recipe for a plain old chocolate chip cookie - ever.  They’ve always had peanut butter or pretzels or oatmeal or something else taking away from that tried and true pure Chocolate. Chip. Cookie.

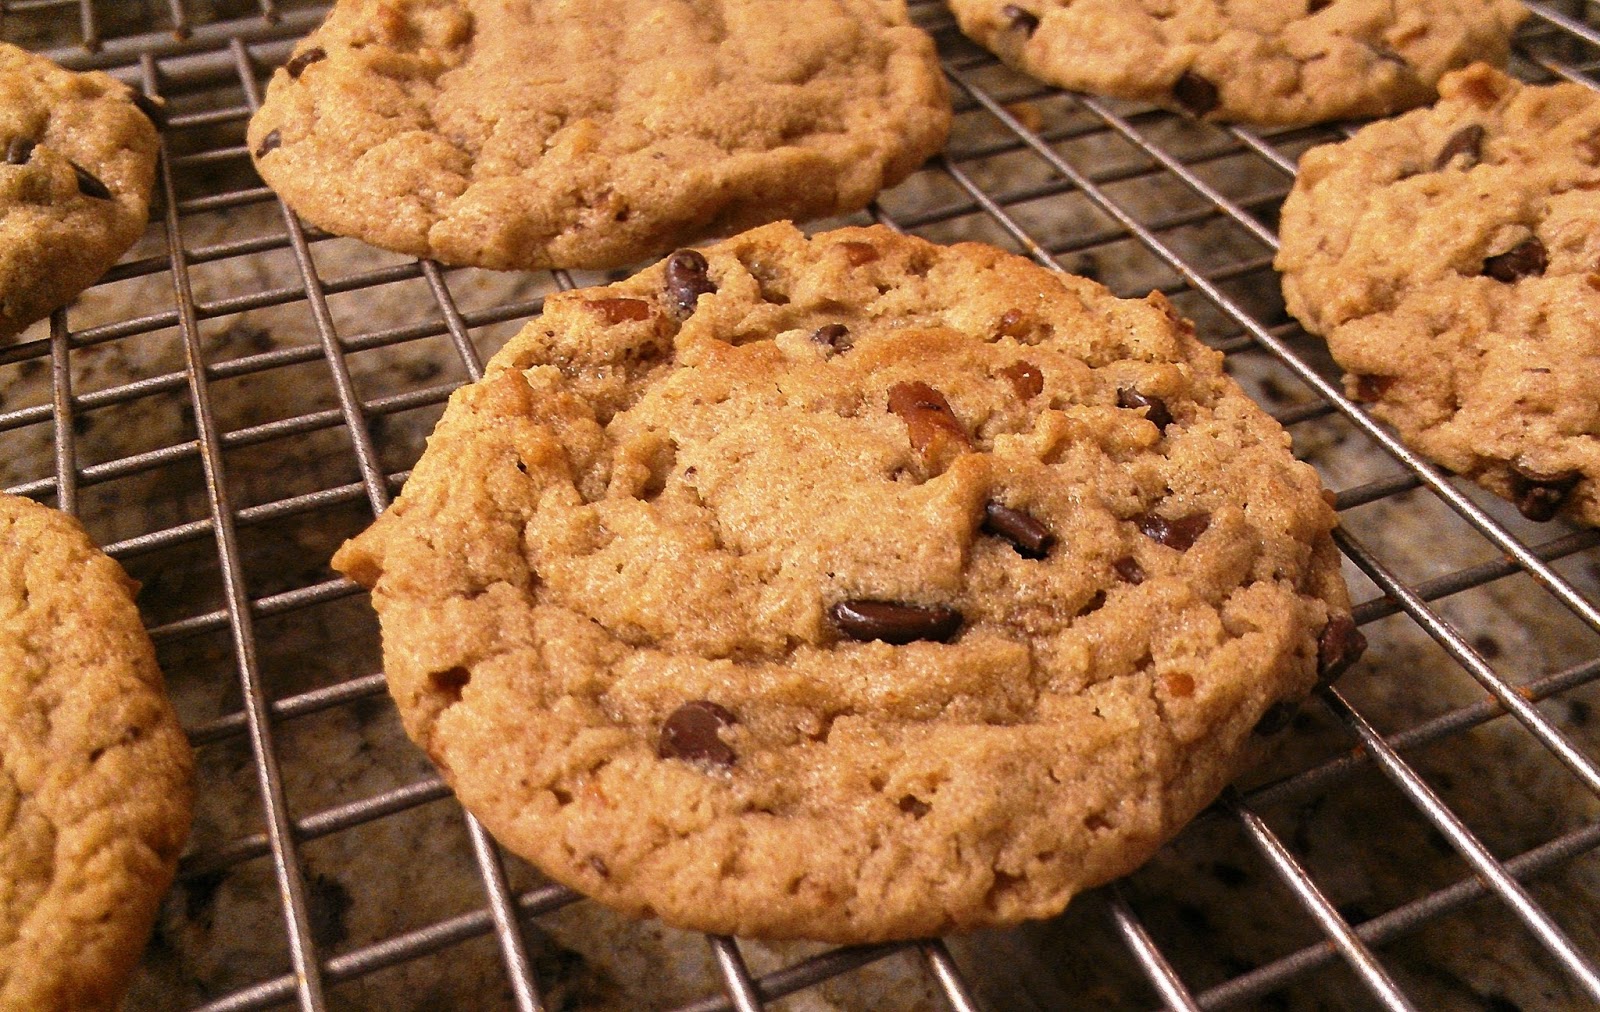
Obviously that had to change, and stat.  And I decided to go big…Baking GALS Round 33 gets these Thick and Chewy Chocolate Chip Cookies.  And lucky them.  Forget those old school Nestle Tollhouse, or god forbid…Chips Ahoy (yikes!).   This should forever be your go-to recipe.  These particular cookies are huge,  I mean seriously honkin’ but you can always make them whatever size you like.  From the brown sugar to the extra yolk and the melted butter, these are some of the richest, most flavorful I’ve ever had.  The recipe calls for semi-sweet chips.  I felt like a big cookie called for a bigger piece of chocolate, so I went with chunks and I think it worked well.  Let’s get down to business so you can go hit the kitchen…like now.

Don't worry - I ate this one.
INGREDIENTS:
2 cups, plus 2 tablespoons All-Purpose flour
½ tsp. baking soda
½ tsp. salt
12 Tbsp. (1 1/2 sticks) unsalted butter, melted and cooled until warm
1 cup packed light or dark brown sugar (I used ½ of each)
½ cup granulated sugar
1 large egg, plus 1 egg yolk
2 tsp. vanilla extract
1-1 ½ cups semisweet chocolate chips
DIRECTIONS:
1. Adjust the oven racks to the upper- and lower-middle positions and heat the oven to 325º.  Line 2 large baking sheets with parchment paper or spray them with nonstick cooking spray.

2. Whisk the flour, baking soda, and salt together in a medium bowl; set aside.

3. Either by hand or with an electric mixer, mix the butter and sugars until thoroughly blended.  Beat in the egg, yolk, and vanilla until combined.  Add the dry ingredients and beat at low speed just until combined.  Stir in the chips to taste.

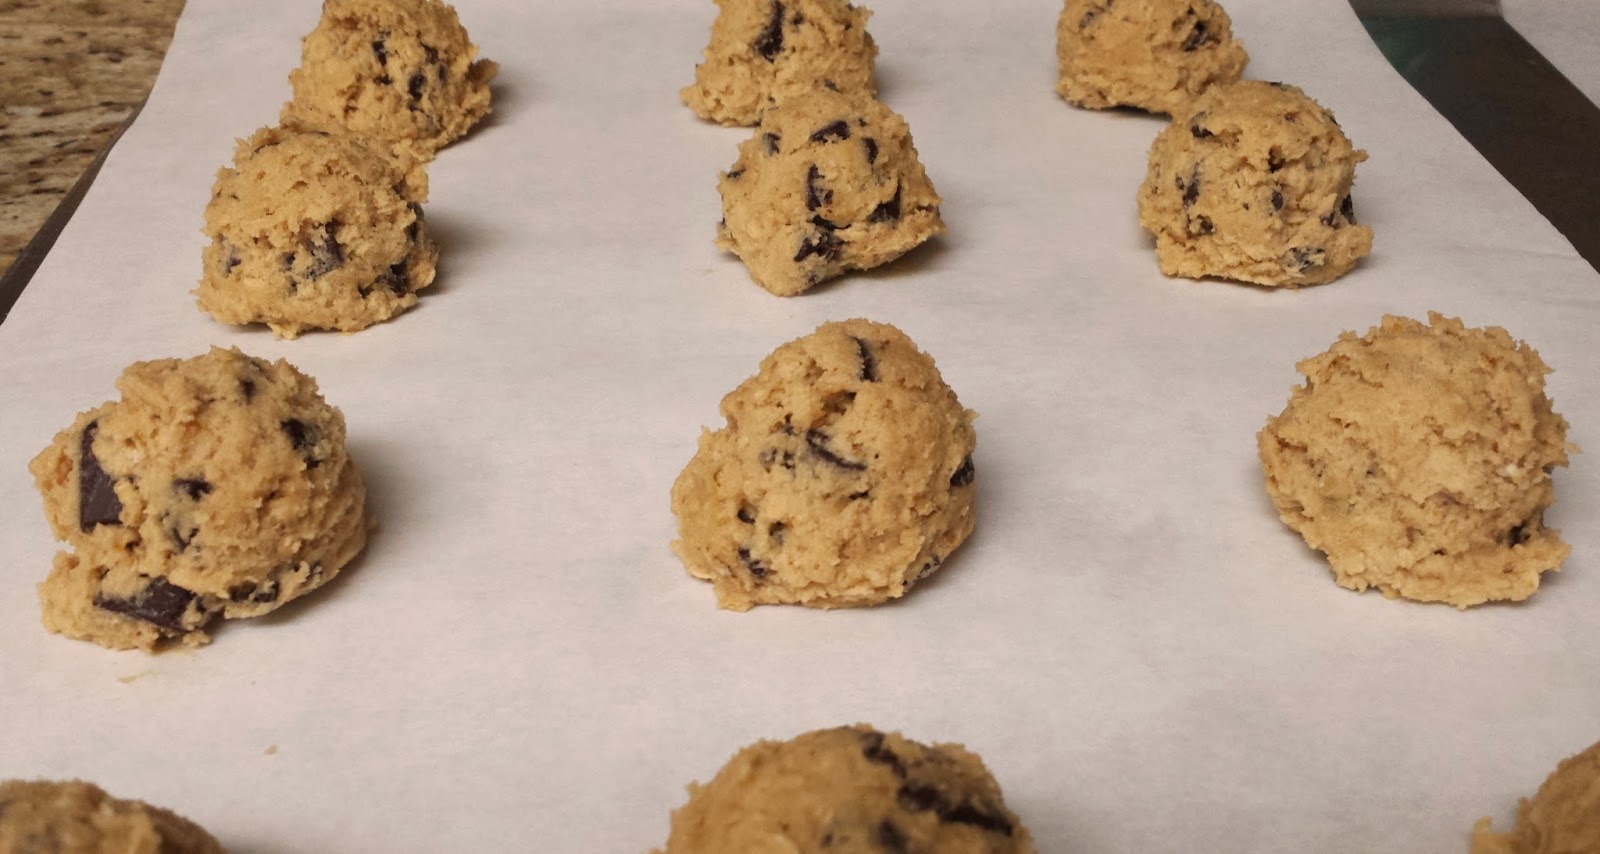
4. Roll a scant ¼ cup of the dough into a ball.  Hold the dough ball with the fingertips of both hands and pull into 2 equal halves.  Rotate the halves 90 degrees and, with jagged surfaces facing up, join the halves together at their base, again forming a single ball, being careful not to smooth the dough's uneven surface. (I skipped that part and used a ¼ cup cookie scoop)  Place the formed dough balls on the prepared baking sheets, jagged surface up, spacing them 2 ½ inches apart.

5. Bake until the cookies are light golden brown and the outer edges start to harden yet the centers are still soft and puffy, 15 to 18 minutes, rotating the baking sheets front to back and top to bottom halfway through the baking time.  Cool the cookies on the sheets for about 10 min.  Remove the cooled cookies from the baking sheets with a wide metal spatula.

Recipe adapted from Baking Illustrated

Tuesday, June 10, 2014

Cookies - Me vs. The Machine


Potbelly.  Who would have thought they would be my cookie-baking nemesis?!  I certainly didn’t.  I figured it would be some great artisanal baker, but no.  I’ve heard from several people over the years about how amaaazing their cookies and ice cream-cookie sandwiches are….blah, blah, blah.

Challenge accepted and nemesis no more, my friends.  I think I have finally conquered their most popular cookie – the oatmeal chocolate chip, of course.

Like a true professional, I did my research over time.  I made tweaks to a recipe I already know and love, I tried a couple new recipes from other blogs, I bought a Potbelly cookie and tried to figure out if there was some secret spice I was missing (Anyone see that Friends episode with Monica dissecting what turned out to be a Nestle Tollhouse recipe??  Yup, same.).  I even emailed Potbelly’s customer service and asked them about their recipe.  I’ll get to their response in a sec.  But finally, I got the golden ticket one day when a weekly email from King Arthur Flour showed up in my inbox featuring their version…bingo.  I should have thought to go to them first.

Here is their recipe:

Ingredients
1 cup (2 sticks) unsalted butter, at room temperature
1 cup light brown sugar, packed
1/2 cup granulated sugar
1 large egg, at room temperature
1 large egg yolk, at room temperature
1 tablespoon vanilla extract
2 cups All Purpose Flour
1 cup quick-cooking or old-fashioned oats 
1 teaspoon baking powder
1 teaspoon baking soda
1 teaspoon kosher salt or 3/4 teaspoon regular table salt
3 cups semisweet chocolate chips
Directions
1) Preheat the oven to 325°F. Line several cookie sheets with parchment paper, or lightly grease with non-stick vegetable oil spray.
2) Beat together the butter and sugars until smooth.
3) Add the egg, egg yolk, and vanilla one at a time, beating well after each.
4) Whisk together the flour, oats, baking powder, baking soda, and salt, and add to the butter mixture in the bowl.
5) Mix until everything is thoroughly incorporated. Scrape the bottom and sides of the bowl, and mix briefly.
6) Stir in the chocolate chips.
7) Scoop the dough onto the prepared baking sheets, leaving about 1 1/2" to 2" between cookies.
8) Bake the cookies for 12 to 15 minutes, until they're a light golden brown, with slightly darker edges. Their middles may still look a tiny bit shiny; that's OK, they'll continue to bake as they cool on the pan.
9) Remove the cookies from the oven, and as soon as they're set enough to handle, transfer them to racks to cool.

As good as this recipe is, I still make my own adjustments to get the texture I want – I use jumbo eggs instead of large, I add some extra oats (about 1/2-3/4 cup), perhaps a pinch more baking soda or powder.  I will say that their use of a full tablespoon of vanilla is unique – don’t skimp on that, it makes all the difference.  And whatever you do, make sure its pure vanilla extract and not imitation.  Ick.

As for Potbelly’s customer service response….well first, I checked their website and it just says that a particular recipe is used and they are baked fresh daily.  Ok fine, but I wanted more than that.  I asked if the dough is actually made on sight or if they just get dough that they bake at each location.  I also asked if the recipe was Potbelly’s or from a third party bakery.  The response (which to their credit, I did receive within 24 hours) was, “They are baked fresh each day from dough which is made according to a Potbelly recipe.”  Hmmm, they get kudos for using their own recipe, but this is still vague enough, and I’ve watched enough “How It’s Made” in my day to guess that this dough arrives at each store in big gallon buckets (likely with added sodium and preservatives) and just gets scooped out and plopped onto baking sheets.  Nothing horribly wrong with that I suppose, but for all the hype they get, you’d hope that there’s at least some skill and passion involved.  Next time you get the craving, come to my kitchen instead….to borrow from Seinfeld – admittedly the context is a bit different – they’re real and they’re spectacular!!

Another batch laying in wait

**Note** – I made these for my Baking GALS Round 31.  While I would love to devour them all myself, I thought it best to get them out of the house immediately and spare my figure.  And no, I did not skip Rounds 29 and 30 – I made repeat cookie and scone recipes the past couple months and therefore didn’t bother boring you with the details.  No worries, the troops were fed!

Tuesday, March 11, 2014

Oatmeal Triple Chocolate Cookies - Baking GALS Round 28


After almost 2 ½ years of sending baked goods overseas, it’s difficult to come up with something I know will be delicious, but that I haven’t already sent.  I flag tons of recipes to try out, but a lot of them likely wouldn’t survive the shipping (those brownies last month were definitely a risk!).  This time I decided to go with my old trusty White Chocolate Cranberry cookies (Road Cookies) , but with a twist to make them new again…


I omitted the cranberries and instead added both milk and dark chocolate chips to the white.  I left out the nutmeg, but included ¼ tsp of the cinnamon for that warm “Mexican chocolate” touch.  I think they turned out great….in fact, I may make them a new staple on www.bakeridc.com.  I just hope my guy this month likes chocolate!

I have a couple new scone recipes churning in my head – next month I may have to go that route – stay tuned….

*Also, if you feel so inclined, I have a feeling some chopped up bacon would taste absolutely amazing in these!

Tuesday, November 12, 2013

Eggnog Cookies - Baking GALS Round 25


What’s your oldest memory of eggnog?  Is it something you had with your family during the holidays?  Or still do?  I remember early on in elementary school, our class made a cookbook and one of my classmates submitted a recipe for homemade eggnog.  I’d probably had it at some point before this, but making it from that recipe is the first experience that comes to mind.  I loved it right from the start.  Of course that wasn’t the adult version, which I also am a big fan of!

So, the big question with eggnog in baked goods is, will the flavor actually come through?  I’ve made eggnog scones before and I remember them being good, but not really having a strong eggnog flavor.  Maybe I used a light variety or needed to add more, who knows – but after making these cookies, I’ll be playing around with those scones again as there was no shortage of flavor here!

This recipe actually called for the addition of dark chocolate chunks.  I’m sure that is also delicious, but eggnog to me just screams nutmeg, so I omitted the chocolate and added some nutmeg and cinnamon chips instead.  To me, they are absolutely perfect like this, but if you prefer chocolate, just sub out the same amount that I used for the cinnamon chips.

Go ahead - add a splash of bourbon.  :)
Recipe adapted from Brown Eyed Baker (www.browneyedbaker.com) 

Ingredients
1 cup + 2 Tbsp AP flour
½ tsp baking powder
¼ tsp salt
½ tsp ground nutmeg
6 Tbsp unsalted butter, at room temperature
½ cup + 2 Tbsp granulated sugar
¼ cup Eggnog (light not recommended)
1 egg yolk
½ tsp vanilla extract
½ cup mini cinnamon chips

Instructions
Preheat oven to 300º.  Line two baking sheets with parchment paper and set aside.

In a small bowl, whisk together the flour, baking powder, salt and nutmeg; set aside.

Using an electric mixer, in a large bowl, beat butter and sugar at medium speed until light and fluffy, about 3 minutes.  Scrape down the sides of the bowl and add the eggnog, egg yolk, and vanilla.  Continue to beat at medium speed until completely mixed, about 2 minutes.

Reduce mixer speed to low and add the dry ingredients in two batches, mix until just combined.  Using a rubber scraper, fold in the cinnamon chips and make sure all flour is incorporated.

Using a small or medium cookie scoop, drop dough onto the cookie sheets about 2 inches apart.  Bake for 20-25 minutes or until the edges are set and just starting to turn a golden brown and the centers spring back when touched lightly.

Remove from oven and let rest on the cookie sheets for 1 minute then transfer to wire racks to cool completely.  Store in an air-tight container.


**Note 1** I used a medium cookie scoop and this recipe made about 18 cookies – therefore you may want to double it!

**Note 2**  Order a batch and let me do the work - check out Bakeri and let me know what I can make for you!


Saturday, October 12, 2013

Salted Caramel Chocolate Shortbread Bars - Baking GALS Round 24


Back in the spring I went on a trip out to San Francisco and wine country with some friends.  We stayed both in the city and out in Sonoma.  In almost every grocery store, corner shop and coffee house we went into I kept running into these bars, taunting me at every turn, until finally I gave in.  I am so glad I did.  They were just as good as I’d imagined.  I love shortbread and I love caramel even more.  Chocolate – eh – I could go either way, but when mixed with other things, I’m down…

A few months ago I came across this recipe – score!!  Not that I wouldn’t take a trip back out west and hunt these things down, but even better if I can make them on any old rainy day when I’ve got some time to kill.  I’ll admit, I didn’t love this shortbread recipe – where’s the flavor??  I added some vanilla extract.  I think it helped, but I have a tried-and-true shortbread recipe I think I may try with this next time.  I also added a little vanilla to the caramel portion as I think it adds that extra oomph that takes the toasty sweetness of caramel over the edge to amazingness (is that a word?  you know what I mean).

Not that you’d think it from the name, but these are definitely not for the diet conscious, so you may want to wait until you’re having a “skinny day” then just allow yourself to indulge, I promise it will be worth the extra mile you need to run after.

Ingredients:
For the shortbread layer: 
2 cups all-purpose flour
2 teaspoons baking powder
1/4 teaspoon salt
1 cup unsalted butter, at room temperature 
1/2 cup granulated sugar 
1 tsp vanilla extract (my addition)

For the caramel layer: 
1 cup unsalted butter, cut into pieces
1 cup granulated sugar
1/4 cup light corn syrup
2 (14 oz.) cans sweetened condensed milk 
1/2 tsp vanilla extract (my addition)

For the chocolate layer: 
8 oz. bittersweet or semisweet chocolate
1 teaspoon light corn syrup
1/2 cup unsalted butter, cut into pieces 
fleur de sel, for sprinkling 

Instructions
To make the shortbread layer, preheat oven to 325F. Line a 9x13-inch baking pan with parchment.  With a fork, in a small bowl, whisk together the flour, baking powder and salt.  Set aside.  Beat together the butter and sugar in the bowl of an electric mixer until blended, 1-2 minutes.  Blend in the dry ingredients on low speed until just combined.  Evenly press the dough into the prepared pan and bake 13-18 minutes, until golden. If the crust puffs up while in the oven, just gently press it back down again after it bakes.  Allow to cool completely. 

To make the caramel layer, in a medium saucepan over medium heat, combine the butter, sugar, corn syrup and condensed milk.  Heat, stirring every now and then, until the butter has melted. Increase heat to medium-high and bring to a boil, then reduce to a simmer, stirring constantly, until the mixtures becomes amber and thickens slightly (may take about 20 min).  Pour the caramel over the cooled shortbread layer, smooth, and allow to set and cool completely. 

To make the chocolate layer, combine the chocolate, corn syrup and butter in a double boiler.  Heat, stirring occasionally, until the chocolate and butter are completely melted and the mixture is smooth.  Pour the mixture evenly over the set caramel layer and smooth the top.  Allow to cool.  Sprinkle the fleur de sel on top.  Slice, serve and keep chilled (may be easier to slice when chilled). 

**Couple notes** 
You can use whatever type of chocolate you like here.  Out in CA they were being sold with milk chocolate and dark chocolate.  Obviously this recipe calls for bittersweet – use your favorite!

As you can see, I added the fleur de sel a little early on these and it melted into the chocolate a bit.  It doesn’t affect the flavor, but it just doesn’t look as pretty.  Just wait a little longer for your chocolate to cool before you sprinkle on the salt.

From:  Four and Twenty Blackberries

Saturday, September 14, 2013

Norway's Best Pepper Cookies - Baking GALS Round 23


Back to Baking GALS!  August is always a hairy month for me in the kitchen – I feel like I’m running around non-stop the whole month between vacations and generally just spending as much time outdoors as possible…not to mention just being exhausted when I get home from work after being so busy doing catch-up work when I actually am in the office.  At any rate, I got my shipment out for September and this was a good one, in my humble opinion.

If I haven’t mentioned it, I’m Norwegian (well, nearly half anyway) and my mom being very proud of that heritage has trickled down to me.  Enough so that I’ve recently even started a little bakery business called what else, Bakeri – the Norwegian word for bakery. I’ll do a full post about the business very soon so stay tuned (and start thinking of what you’d like to order!), but as I’m creating the menu, I of course need to make sure I have a couple Norwegian staples on it right?  Enter these pepper cookies.  Scandinavians like things with a little kick – think of all those Swedish ginger snaps that are out there…slow, warm heat.  Same idea here.  Mix some black pepper with the favorite ingredient of cardamom and again, slow, warm heat.  Sweet, savory and spicy all at once – it’s unique and delicious.  I found this recipe while searching online and I’m declaring it a keeper!

Pre-baking.  That's not kosher salt on top - it's Swedish Pearl Sugar!
Just out of the oven.
Recipe adapted from Embassy of Norway, Washington DC

Ingredients

1 1/8 cups butter
1 cup granulated sugar
¼ cup heavy whipping cream
1 tsp baking soda
3 ¼ cup AP flour
1 tsp ground cinnamon
1 tsp ground black pepper
1 ½ tsp ground cardamom
1 tsp baking powder
Water

*Note, it is not an omission – this recipe does not call for eggs.

Instructions

Cream together the butter and the sugar until light and fluffy. Stir in the cream. Add the baking soda and little water (no more than 2 tablespoons) to the butter mixture.

Sift the spices, baking powder and flour into the butter mixture. Blend until a nice uniform dough is formed. Roll dough into sausages about 2-1/2 inches in diameter wrap tightly and let dough chill thoroughly. 

Preheat oven to 375 degrees F (190 degrees C). Remove chilled dough and cut into thin slices. Bake on a lightly greased cookie sheet for 6 to 8 minutes. Let cookies cool on wire rack.

*Note #2 - I did not do this “sausage” method – I just chilled the bowl of dough in the fridge for 30 min or so, then used a medium-sized cookie scoop (about 2 Tbsp) and flattened them slightly. 

Sunday, June 16, 2013

Peanut Butter Pretzel Chocolate Chip Cookies - Baking GALS Round 21


I don’t think anyone would argue that the combination of salty and sweet is one of the best flavor profiles out there.  If something is cloyingly sweet I can only handle a few bites – and if it’s too salty, ugh, give me some water immediately!  When the two come together though, it is a dangerously magical mix.  That’s these cookies – beware.

If you like peanut butter, then you probably love peanut butter cookies, I mean, how could you not?  Add a little chocolate and you’ve stepped it up a notch.  Add crushed pretzels and your mind will be blown – they not only add some salt, but the texture is awesome.  This peanut butter cookie recipe isn’t the hard, almost crumbly variety you have probably had at some point – this is chewy, so the crunch from the pretzels is welcome, as is that gooeyness from the chocolate chips. Mmmm!  Ok, I think I’ve made my point – the word for these: amazeballs.

Thankfully the recipe didn’t make a ton, so I had one to try them (it’s a requirement), then immediately packed up the rest and shipped them out.  I hope the guys liked them as much as I did!  Here’s how it’s done:

INGREDIENTS:
(Recipe adapted from www.browneyedbaker.com) 

1 cup all-purpose flour
¾ cup finely crushed pretzels (I used about a cup)
¾ teaspoon baking soda
¾ teaspoon salt
1¼ cups light brown sugar
¾ cup creamy peanut butter
½ cup vegetable shortening
3 tablespoons milk
1 tablespoon vanilla
1 egg
⅓ cup mini chocolate chips (I think I used about ½ cup)


INSTRUCTIONS:
1. Preheat oven to 375°. Line baking sheets with parchment or a silicone baking mat.
2. Whisk together the flour, crushed pretzels, baking soda and salt in a small bowl and set aside.
3. Combine the brown sugar, peanut butter, shortening, milk and vanilla in a mixing bowl.  Beat at medium speed until well blended.  Add the egg and beat just until blended.  Reduce speed to low and add the flour mixture gradually, mixing just until combined.  Using a rubber scraper, stir in the chocolate chips.

4. Use a medium cookie scoop – about 2 Tbsps - to scoop dough and roll into a ball between the palms of your hands (I skipped the rolling).  Place on the baking sheets, about 2 inches apart.  Optional - Dip the tines of a fork into a cup of water and make a crisscross pattern on the cookies, flattening them slightly.  Repeat dipping the fork in water as necessary if it starts to stick to the dough.
5. Bake for 8-9 minutes or until set and beginning to brown around the edges.  Cool for 2 minutes on the baking sheet before removing to a cooling rack.  Can be stored in an airtight container at room temperature for up to a week, though I doubt they’ll be around that long.
Saturday, May 11, 2013

Chewy Molasses Spice Cookies - Baking GALS Round 20


Wow – these cookies pack a serious punch of flavor.  I know spice cookies are generally made more around the holidays, but when I saw this recipe on one of my favorite blogs (www.browneyedbaker.com) I knew they would be perfect for my troop shipment.  What is a more homey comforting thing than the aroma and taste of warm, sweet, earthy spices, particularly cinnamon?  When they were baking I definitely felt comforted, so hopefully as the guys are chowing down on them, they will too.   My suggestion, pop them in the microwave for just 10 seconds or so to get that smell wafting through the air….and a soft warm cookie ain’t bad either.

I’m thinking I might have to make these more summery as I definitely don’t think I can wait until next winter to make them again.  How so??  Make ‘em a little bigger and sandwich some homemade vanilla ice cream in between them – Y.U.M.

INGREDIENTS:
2¼ cups all-purpose flour
1 tsp baking soda
1½ tsp ground cinnamon
1½ tsp ground ginger
½ tsp ground cloves
¼ tsp ground allspice
¼ tsp ground black pepper
¼ tsp salt
¾ cup (1 ½ sticks) unsalted butter, at room temperature
⅓ cup granulated sugar
⅓ cup dark brown sugar
1 egg yolk
1 tsp vanilla extract
½ cup molasses
For Rolling:
½ cup granulated sugar
DIRECTIONS:
1. Preheat oven to 375º F. Line two baking sheets with parchment paper.
2. In a medium bowl, whisk together the flour, baking soda, cinnamon, ginger, cloves, allspice, pepper and salt; set aside.
3. Using an electric mixer, beat together the butter and both sugars on medium-high speed until light and fluffy, about 3 minutes. Reduce the speed to medium-low, add the egg yolk and vanilla, then increase the speed to medium and beat until thoroughly combined, about 30 seconds. Again reduce the speed to medium-low and add the molasses, beating until fully incorporated, about 30 seconds, scraping the sides of the bowl halfway through. Reduce the speed to low and gradually add the dry ingredients, mixing until just incorporated, about 30 seconds. Use a rubber scraper to give it a final few mixes to ensure no flour remains.
Rolled and ready for the oven.
4. Place the sugar for rolling in a small bowl. Using a tablespoon or small cookie scoop, scoop the dough and roll into a smooth ball, then toss in the sugar to coat and place on the prepared baking sheet. Repeat with the remaining dough. Bake the cookies, one sheet at a time, until the cookies are browned, still puffy and the edges have begun to set but the centers are still soft, about 11 minutes. Be sure not to over bake the cookies.  Otherwise - crunchy, not chewy - blah.
5. Allow the cookies to cool on the baking sheet for 5 minutes, then remove to a wire rack to cool completely. The cookies can be stored in an airtight container at room temperature for up to 5 days.
Fresh baked!
*A couple notes:
These cookies flatten out quite a bit as they cool, I’m wondering if adding the full egg and some baking powder may make them puff up a little more - I tend to like a thick chewy cookie.  Even thin though, these are really great – I may just play around a little next time J
She says to use a small cookie scoop and that it will yield about 24 cookies – well we must have different definitions of small, because I used my small scoop and got a little over 40 cookies!  Just a heads up.

Tuesday, March 5, 2013

White Chocolate Macadamia Nut Cookies - Baking GALS Round 18


Just when I was starting to think I could no longer be WOWed by a cookie (other than all those crazy novelty cookies with Oreos/Snickers/etc. hidden inside), I discovered this recipe.  I’ve eaten white chocolate macadamia cookies before, but believe it or not, I don’t think I’ve ever even had a macadamia nut in my own kitchen – ever.  I needed a new cookie to send to the guys this month and since this one is new to me, it was getting its turn. 

I allllmost made this recipe as is – just one minor tweak.  I’m still not sold on coconut so I omitted the coconut extract and subbed in more vanilla.  Do what you like though.  I’ll tell ya, I could have stood there with a spoon and eaten this dough straight out of the bowl, and that’s not usually my M.O.  I can take a bite or two of chocolate chip cookie dough, but then it gets to be too much.  I had to get these baked ASAP (not to mention take a guilt trip down to the gym for a 45 minute run while the dough was chilling) in order to avert diet disaster.  Why do these ingredients work so well together?  I guess it’s the creaminess of both, if a nut can be creamy (no comments please), not to mention the couple sticks of butter in the dough.  Whatever it is, it makes these freakin’ awesome.  Definitely give them a try, and good luck actually getting them into the oven – though I promise, they have two sweet spots: 1) dough form, and 2) approximately 6-7 minutes post oven-removal, trust me.

Recipe adapted from Annie’s Eats (www.annies-eats.com)

Ingredients

3 cups AP Flour
1 tsp coarse salt
1 ¼ tsp baking powder
½ tsp baking soda

1 cup (2 sticks) unsalted butter, cold and cut into chunks
1 cup granulated sugar
½ cup packed light brown sugar
2 large eggs
1 tsp vanilla extract
½ tsp coconut extract (optional)

12 oz white chocolate, coarsely chopped
1 ½ cups macadamia nuts, coarsely chopped

Instructions

Whisk together the first four ingredients in a medium bowl and set aside. 

Combine the butter and sugars and beat in stand mixer or by hand until smooth and just combined - couple minutes (I have a hand mixer and I found that mixing these with a pastry blender first, then beating, helped tremendously).  Beat in the eggs one at a time just until incorporated.  Blend in the vanilla and coconut, if using.

With mixer on low speed, mix in the dry ingredients slowly, just until combined.  Fold in the white chocolate and macadamia nuts with a spatula.  This dough is chock full of chocolate and nuts, I promise, it’s not too much!

Cover and refrigerate for 30-60 minutes.

Preheat oven to 350º.  Line baking sheets with parchment paper.  Roll a scant ½ cup of dough into a ball.  Holding dough in fingertips of both hands, pull apart and rotate 90 degrees then place jagged side up on the baking sheet.  **This is supposed to improve the appearance of the cookies when baked, but I just used my large cookie scoop and scooped dough directly onto the sheets – as you can see in the picture, they turned out fine.**


Bake the cookies, rotating halfway through, until golden and just set – about 14-16 minutes.  Let cool on the cookie sheets for about 2-3 minutes then transfer to cooling racks to cool completely.


Tuesday, July 17, 2012

Baking GALS Round 12 - Salted Espresso Oatmeal Chocolate Chip Cookies


Round 12?  Really?!  I can’t believe I’ve been doing this for a year already.  It’s definitely been one of the most fulfilling things I have done this past year.  And when something you do for fun because you love it ends up also being rewarding, that is one of the greatest feelings.  Enough about me though – thanks again to all the troops who are putting their lives on the line every day.  I hope the treats you’ve received from this organization bring you at least a small piece of the comforts of home.

On to the cookies.  Salted Espresso Oatmeal Chocolate Chip cookies – wow, now that’s a mouthful.  These cookies are pretty basic, but with a couple little touches to amp up the flavor.  Everyone has had oatmeal chocolate chip at some point in life, but with the addition of a little espresso powder to enhance the chocolate and some salt sprinkled on top to create a great salty-sweet balance, you get something super tasty.  Something new but familiar enough to comfort…perfect.

*I’m taking the lazy way out today – for the recipe check out Brown Eyed Baker -  http://tinyurl.com/6oeu5zw


Tuesday, May 8, 2012

Cake Batter Cookies


Who doesn’t love funfetti cake right?  It’s so festive and a fun surprise when you cut into an iced cake and see all the colors inside (and not to ruin the surprise, but “funfetti” is just sprinkles in the cake batter – hopefully you knew that, but I did burst the bubble for one friend…).  Well take all that and put it in cookie form – voila!  Funfetti cookies!

These are super chewy cookies and taste like an amped up sugar cookie.  I know I know, sugar cookies are a little boring as I’ve mentioned before, but in addition to adding cake batter to this cookie dough, you also add vanilla pudding mix – the combination makes for a rich vanilla flavor and awesome texture.  I’m a chewy cookie fan, so these seriously hit the spot.  Thankfully I made them for a birthday party (what up – J-Day Twenty-Twelve!!) and for the troops (Baking GALS Round 10) so they have successfully been removed from my house before I plowed through the entire batch myself.  They aren’t the most inventive or decadent cookies you’ll ever have, but they are definitely a great tag-along to any ice cream or cookie platter.  Enjoy!   

Recipe courtesy Chef in Training (www.chef-in-training.com) 
Ingredients 
§     1 1/2 sticks (or 3/4 cup) unsalted butter
§     3/4 cup brown sugar, packed
§     1/4 cup granulated sugar
§     1 (3.4 oz) package instant vanilla pudding mix, dry
§     3/4 cup yellow cake mix, dry
§     2 eggs
§     1 tsp vanilla
§     1 tsp baking soda
§     2-1/4 cups flour
§     1/2 tsp salt
§     Colored sprinkles

Instructions
Preheat oven to 350 F.
Stir together flour, salt and baking soda and set aside.
In a large bowl, cream butter and sugars together.
Add in pudding package and cake mix and beat until well blended.
Add eggs and vanilla and mix until smooth.
Add flour mixture slowly until well incorporated.
Mix in sprinkles.
Roll into 1″ balls and place on greased baking sheet, or sheet lined with parchment paper.
Bake at 350 F for 10-12 minutes.  They will be puffy and very slightly golden on the edges.  They will collapse a bit as they cool – don’t worry about it.

Monday, October 10, 2011

Baking GALS Round 4 - Pumpkin Snickerdoodles


So it’s officially fall, and better yet, officially the best month of the year – yeah that’s right, October – you didn’t know?  Well consider yourself informed! J  Don’t get me wrong, I love a good hot sticky DC summer night and a warm breezy day on the beach, but when that cool crisp air rolls in and ridiculously delicious apples appear at the markets, you know it’s October and it’s awesome.

October also means pumpkin season, so for this month’s BakingGALS shipment I thought I’d give the guys a little taste of the season.  I know I have semi-bashed snickerdoodles before, claiming they are overdone/boring, but when I saw this recipe for a pumpkin version I knew I had to try it.  I love the texture of a snickerdoodle – soft and a little cakey – and we know I love cinnamon, so add pumpkin to that and voila, not so boring anymore!  The flavor of these cookies is subtle but satisfying – almost like a pumpkin pancake with the syrup baked in – and the pumpkin puree keeps the texture just right with a moist soft crumb.  Yum.  

Adapted from Annie's Eats (http://annies-eats.com/)
Ingredients:
For the cookies:
3¾ cups all-purpose flour
1½ tsp. baking powder
½ tsp. salt
½ tsp. ground cinnamon
¼ tsp. ground nutmeg
1 cup (2 sticks) unsalted butter, at room temperature
1 cup sugar
½ cup light brown sugar, packed
¾ cup pumpkin puree (I probably used 1 cup – thought the dough wasn’t pumpkin-y enough)
1 large egg
2 tsp. vanilla extract

For the coating:
½ cup sugar
1 tsp. ground cinnamon
½ tsp. ground ginger
Dash of allspice


Directions:
In a medium bowl, combine the flour, baking powder, salt, cinnamon and nutmeg.  Blend and set aside.  In a large mixing bowl, beat together the butter and sugars on medium-high speed until light and fluffy, about 2-3 minutes.  Blend in the pumpkin puree.  Beat in the egg and vanilla until incorporated.  With the mixer on low speed add in the dry ingredients and mix just until incorporated.  Cover and chill the dough for at least 1 hour.

Preheat the oven to 350˚ F.  Line baking sheets with silicone baking mats or parchment paper.  Combine the sugar and spices for the coating in a bowl and mix to blend.  Scoop the dough (about 2½ tablespoons) and roll into a ball.  Coat the dough ball in the sugar-spice mixture and place on the prepared baking sheet.  Repeat with the remaining dough to fill the sheets, spacing the dough balls 2-3 inches apart.  Dip the bottom of a flat, heavy-bottomed drinking glass in water, then in the sugar-spice mixture, and use the bottom to flatten the dough balls slightly.

Bake the cookies for 10-12 minutes, or until just set and baked through.  Let cool on the baking sheets about 5 minutes, then transfer to a wire rack to cool completely.  Store in an airtight container.