Friday, July 11, 2014

Strawberry Rhubarb Crisp Bars - Baking GALS Round 32


Bebopareebop Rhubarb Pie.  Ever heard of it?  How about “Mama’s little baby loves rhubarb, rhubarb…”  Still no?  Ha – well, it’s not surprising.  This little ditty is from Garrison Keillor’s A Prairie Home Companion – a show on NPR my parents would religiously listen to on Saturday evenings.  I don’t remember when I heard it, but it was definitely more than a decade ago (yikes!)…and I think it was only the second time I had ever heard of rhubarb.  The first was on a family vacation in Nova Scotia when my dad’s aunt made a rhubarb pie.  Since I was probably about 10 years old, I’m pretty sure I turned my nose up and didn’t try a bite.  Funny how both of these things have stuck with me though, huh?

Well, now with my much more sophisticated and refined palate (ha!), I have baked with it a few times and so far, liked everything I’ve made.  Rhubarb is such an interesting vegetable.  It looks like and has the consistency of pretty celery, but almost tastes like a really tart apple, and despite its tartness, is almost always used in sweet recipes rather than savory.  This recipe is obviously no exception.  I am on a strawberry rampage this summer, so I was excited to try this – it gave me a chance to take what I know and love and add something less familiar.  By the way, did you know that rhubarb leaves are toxic??  True story.  Remove and discard please!

Anyway, on to the bars.  I have a coworker who likes to try my new recipes so I brought her one for an opinion….to quote her exactly, “Oh my god, I think this is the best thing you’ve ever made.”  WOW – now that’s a bold claim, especially since she’s had my sour cream coffee cake which I swear by.  Not a minute later, she shouted down the hall, “I want these for my birthday!”  Ha, yes maam, done and done.  I’m convinced it was the addition of my go-to secret ingredient (a spice used often in Scandinavian and Indian cuisine).  I add a little to my apple pies too and it totally brings it up a notch.  Perhaps you can figure out what I’m talking about, but if not – well, some things just need to stay a secret. J    

Here are the details and step-by-step pics:

Ingredients:
1 cup rolled oats
3/4 cup, plus up to 2 Tbsp extra all-purpose flour
1/2 cup light brown sugar
Heaped 1/4 tsp table salt
6 Tbsp unsalted butter, melted
1 tsp cornstarch (optional, but helps firm up the filling)
1 Tbsp lemon juice
1 Tbsp granulated sugar
1 cup small-diced rhubarb (from about 1 1/2 medium stalks)
1 cup small-diced strawberries
Secret Spice (optional)
Powdered sugar, for decoration, if desired

Instructions:
Heat oven to 375º. For easy removal, line bottom and two sides of 8-by-8-inch square baking pan with parchment paper. No need to bother (and no greasing needed) if you plan to serve them right in the pan.  This recipe can be doubled and made in a 9x13 pan (this is what I did).


Rinse and chop rhubarb and strawberries into small dice and set aside.

Place oats, 3/4 cup flour, brown sugar and salt in bottom of baking pan and mix. Pour melted butter over, and stir until clumps form. If the clumps feel soft or look overly damp, add the remaining 2 tablespoons flour (I did). Set aside 1/2 cup of the crumble mixture. Press the rest of the crumb mixture evenly in the bottom of the pan.


Sprinkle the fruit evenly with cornstarch, then lemon juice, and 1/2 tablespoon of granulated sugar. Stir to combine.  Spread fruit over crumb mixture evenly.  Scatter reserved crumbs over fruit and bake bars for 30 to 40 minutes (firmer fruits will take longer – mine took almost the full 40), until fruit is bubbly and crisp portion is golden and smells toasty and amazing.


Let cool in pan; I do this in the fridge, where they become crisp once chilled (less so at room temperature). Cut into squares and sprinkle with powdered sugar before serving. Store leftovers in fridge, if they make it that long.


Recipe adapted from Smitten Kitchen

Tuesday, June 10, 2014

Cookies - Me vs. The Machine


Potbelly.  Who would have thought they would be my cookie-baking nemesis?!  I certainly didn’t.  I figured it would be some great artisanal baker, but no.  I’ve heard from several people over the years about how amaaazing their cookies and ice cream-cookie sandwiches are….blah, blah, blah.

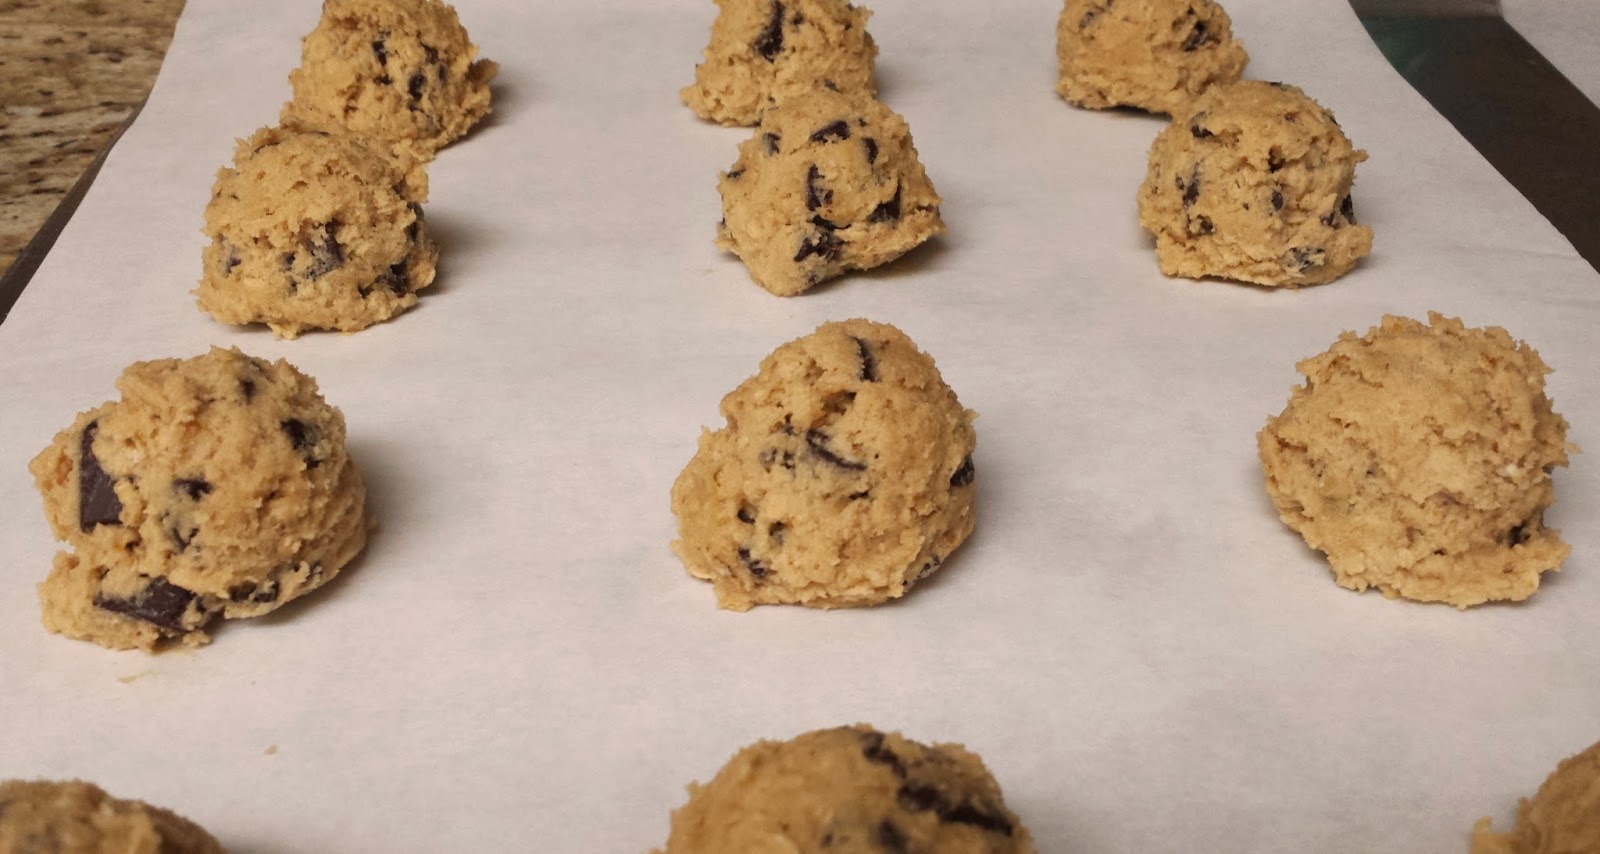
Challenge accepted and nemesis no more, my friends.  I think I have finally conquered their most popular cookie – the oatmeal chocolate chip, of course.

Like a true professional, I did my research over time.  I made tweaks to a recipe I already know and love, I tried a couple new recipes from other blogs, I bought a Potbelly cookie and tried to figure out if there was some secret spice I was missing (Anyone see that Friends episode with Monica dissecting what turned out to be a Nestle Tollhouse recipe??  Yup, same.).  I even emailed Potbelly’s customer service and asked them about their recipe.  I’ll get to their response in a sec.  But finally, I got the golden ticket one day when a weekly email from King Arthur Flour showed up in my inbox featuring their version…bingo.  I should have thought to go to them first.

Here is their recipe:

Ingredients
1 cup (2 sticks) unsalted butter, at room temperature
1 cup light brown sugar, packed
1/2 cup granulated sugar
1 large egg, at room temperature
1 large egg yolk, at room temperature
1 tablespoon vanilla extract
2 cups All Purpose Flour
1 cup quick-cooking or old-fashioned oats 
1 teaspoon baking powder
1 teaspoon baking soda
1 teaspoon kosher salt or 3/4 teaspoon regular table salt
3 cups semisweet chocolate chips
Directions
1) Preheat the oven to 325°F. Line several cookie sheets with parchment paper, or lightly grease with non-stick vegetable oil spray.
2) Beat together the butter and sugars until smooth.
3) Add the egg, egg yolk, and vanilla one at a time, beating well after each.
4) Whisk together the flour, oats, baking powder, baking soda, and salt, and add to the butter mixture in the bowl.
5) Mix until everything is thoroughly incorporated. Scrape the bottom and sides of the bowl, and mix briefly.
6) Stir in the chocolate chips.
7) Scoop the dough onto the prepared baking sheets, leaving about 1 1/2" to 2" between cookies.
8) Bake the cookies for 12 to 15 minutes, until they're a light golden brown, with slightly darker edges. Their middles may still look a tiny bit shiny; that's OK, they'll continue to bake as they cool on the pan.
9) Remove the cookies from the oven, and as soon as they're set enough to handle, transfer them to racks to cool.

As good as this recipe is, I still make my own adjustments to get the texture I want – I use jumbo eggs instead of large, I add some extra oats (about 1/2-3/4 cup), perhaps a pinch more baking soda or powder.  I will say that their use of a full tablespoon of vanilla is unique – don’t skimp on that, it makes all the difference.  And whatever you do, make sure its pure vanilla extract and not imitation.  Ick.

As for Potbelly’s customer service response….well first, I checked their website and it just says that a particular recipe is used and they are baked fresh daily.  Ok fine, but I wanted more than that.  I asked if the dough is actually made on sight or if they just get dough that they bake at each location.  I also asked if the recipe was Potbelly’s or from a third party bakery.  The response (which to their credit, I did receive within 24 hours) was, “They are baked fresh each day from dough which is made according to a Potbelly recipe.”  Hmmm, they get kudos for using their own recipe, but this is still vague enough, and I’ve watched enough “How It’s Made” in my day to guess that this dough arrives at each store in big gallon buckets (likely with added sodium and preservatives) and just gets scooped out and plopped onto baking sheets.  Nothing horribly wrong with that I suppose, but for all the hype they get, you’d hope that there’s at least some skill and passion involved.  Next time you get the craving, come to my kitchen instead….to borrow from Seinfeld – admittedly the context is a bit different – they’re real and they’re spectacular!!

Another batch laying in wait

**Note** – I made these for my Baking GALS Round 31.  While I would love to devour them all myself, I thought it best to get them out of the house immediately and spare my figure.  And no, I did not skip Rounds 29 and 30 – I made repeat cookie and scone recipes the past couple months and therefore didn’t bother boring you with the details.  No worries, the troops were fed!

Sunday, June 8, 2014

Beef (and Snow Peas) - It's What's For Dinner


Recently, on a random Saturday morning, in a Food Network haze, I happened to catch an episode of Pioneer Woman.  She generally makes great looking food but it’s often so heavy and rich I can’t imagine making it unless I’m cooking for a crowd who will ensure no leftovers.  This time though, she made a recipe that looked so simple and supposedly it only took about 20 minutes to whip up…I decided to put it to the test.

Boom.  This dish was as quick as promised – I think the most time consuming part of it was slicing the beef and chopping the ginger.  Otherwise you just toss a few things together and sauté it up.  Dinner in no time, and since that’s pretty much what I have these days, I appreciate that!

What’s even more surprising is that something this fast to make is not at all lacking in flavor.  I added just a pinch of salt, some freshly ground black pepper and a few shakes of garlic powder (in my opinion, almost everything can benefit from garlic).

If you aren’t into snow peas, no problem – I think this would be great with several other vegetables – broccoli or green peppers for example.

I served the beef with quinoa – a pre-seasoned pack of sesame ginger quinoa to be exact.  It was okay, but I quickly remembered why I don’t buy those packets regularly….soooo salty, ugh!  And this is coming from a girl who loves some salt.  I hate to waste food, but I actually trashed the rest of the quinoa and cooked up some plain brown rice to have for next time.  I think it’ll be much better. 

Definitely give it a try – even you non-cooks can handle this one.  The recipe and step-by-step pictures can be found here:    The Pioneer Woman


Wednesday, May 7, 2014

Greek Chicken Salad


So in the event that you are unaware, I am somewhat of a chicken salad queen around these parts.  That’s right.  So much so in fact, last week when a friend sent out a birthday invite, an immediate response from one of the guests was “Will there be chicken salad?”, and I think he was serious. 

I’ve been making the same kind for years.  One I just concocted on my own – it’s a basic recipe but with a couple little twists to give it some extra flair.  Obviously people like my flair as I’ve been asked for the recipe multiple times and finally had to actually think about each step and write it all down.  Seriously…once you’ve had a taste of my salad, you’ll definitely be back for more… 

I’m always on the lookout for new variations to try.  Last year I discovered a recipe for a poppy seed version, which I posted about here.  It’s also quite good.  The almonds add some crunch and the grapes give it a summery sweetness.

But now it’s on to the third!  This recipe was actually for a chicken salad wrap, which just sounded awesome.  I don’t know about you, but sometimes I go through phases of pretty much only wanting sandwiches or wraps, they are just so satisfying – a full meal wrapped up in one package.  However as I’ve mentioned before, I try to keep the carbs at a minimum as summer approaches (beach body, baby!), so I actually ate this over a bed of arugula.  It was delicious as a salad, and I’m sure would be even better as a wrap.  If you like Greek salad, this is a no-brainer, it’s healthy, filling and chock full o’ flavor.


Ingredients
1 (16 oz) can Chick Peas/Garbanzo Beans, drained
¼ cup Italian of Greek dressing (I made my own Greek dressing, see note)
¼ cup Greek yogurt or light sour cream (I used about 1/3 cup plain nonfat Greek yogurt)
1 cup cooked chicken, diced or shredded and cooled (Use 2 cups – its chicken salad!)
½ cup diced cucumber
2 Tbsp diced red onion
1 roma tomato, cored and diced
6 (8 inch) flour tortillas, warmed slightly for easy rolling (optional)
1 cup spinach (or arugula/mixed baby greens)
½ cup feta cheese
6 olives (regular or Kalamata), quartered
*I upped most of the ingredients, especially the chicken – stick with 1 can of beans though.

Instructions
  1. Place half of the garbanzo beans in a large bowl. Gently mash with a potato masher or fork.
  2. Add the remaining garbanzo beans, dressing, yogurt, chicken, cucumber, onion, tomato, feta, and olives to the bowl. Gently stir until well coated and combined.
  3. If using, lay out the tortillas and place some spinach down the center of each.  Place a couple of spoonfuls of the chicken salad mixture in the center of each tortilla on top of the spinach.  Roll tightly and serve.  Otherwise spoon over greens and serve.
Note:  For the Greek dressing, I measured nothing, but here is what I used – red wine vinegar, dried oregano, dried basil, garlic powder, onion powder, Dijon mustard, salt & pepper to taste, and EV olive oil.