Monday, December 15, 2014

Joe Biden's Nuts. Pecans, that is....


Bet that got your attention.  Get your minds out of the gutter, people!  I’m talking about spiced pecans, and they really are from Joe Biden.  Well, more likely Dr./Mrs./Jill, but nevertheless, this recipe was submitted by the VP and his wife to Food Network Magazine a few years ago.  I’ve tried a couple different variations of these in the past, but was in search of something new this year.  And if you know me at all, you know I love Joe B., so I was happy to give these a Go.

This recipe comes together very easily.  The baking takes a while, but after having tried stove-top versions, I think the flavor is better when you bake them.  The flavor of the nuts deepens as they roast, and that’s definitely a good thing.

I did tweak the spices a little.  I cut back on the cumin a tiny bit, increased the cinnamon slightly, added a little brown sugar with the white, and threw in a few shakes of nutmeg as well.  There is plenty of cayenne in here, so even with my sweet additions, these still have a kick!  They are a great holiday party snack or addition to your cheese platter.  I’ll warn you that if you can handle the heat, they are quite addictive, so go ahead and double that batch.  Way to go, Joe (and Jill)!

You can find the recipe here: 


Note - you can substitute any kind of nut you want here.  I've tried similar recipes with walnuts and those are also delicious. 

Sunday, November 16, 2014

Beer Cheese Bread


I have been flagging and saving beer cheese bread recipes for years now, but have shockingly never made any.  Well when I saw this one (in a King Arthur Flour catalog, where else?), and noticed that there were only 4 ingredients, I ripped it out and made it three days later….about time!

As I usually do the first time, I followed the recipe exactly.  As such, the bread is good.  But I can definitely make this better.  First of all, I think ½” chunks of cheese are way too big.  I’m going with ¼” next time for more even distribution.  Also, this could use a little kick – I’m thinking some chopped pickled jalapeno.  I ate this at room temperature the first time and it was good, but I highly recommend toasting it.  The edges get a little crispy and the cheese gets nice and soft – mmm, mmm.  Bread and cheese?  That always hits the spot.

Ingredients

4 cups Self-Rising Flour (I always add an extra pinch of baking powder)
¾ cup Vermont Cheese Powder
8 oz sharp cheddar cheese (I used extra sharp, but it was a little harsh – I’ll use medium next time.  Asiago or Gruyere could be good too.)
2 cups beer – nothing too intense, perhaps a lager

½ cup additional cheddar cheese, shredded, for the topping.


Instructions

Preheat oven to 375º.  Lightly grease a 9” to 10” round deep, lidded Dutch oven or bread crock.

In a large bowl, stir together the flour, cheese powder, and cubed cheese.  Add the beer, stirring until no dry spots of flour remain.

Pour the batter into the Dutch oven or crock and smooth the surface.  Sprinkle with the shredded cheese, cover and bake for about 40 minutes, or until golden brown on top and a digital thermometer inserted in the middle reads at least 190º.

Remove from oven and let rest for 10 minutes.  Turn out onto rack.  Serve warm or at room temperature (or sliced and toasted in the oven!).


Wednesday, September 3, 2014

Chocolate Chip Cookies - Finally.


How is it possible?  In 4 years of writing this blog I have never posted a recipe for a plain old chocolate chip cookie - ever.  They’ve always had peanut butter or pretzels or oatmeal or something else taking away from that tried and true pure Chocolate. Chip. Cookie.

Obviously that had to change, and stat.  And I decided to go big…Baking GALS Round 33 gets these Thick and Chewy Chocolate Chip Cookies.  And lucky them.  Forget those old school Nestle Tollhouse, or god forbid…Chips Ahoy (yikes!).   This should forever be your go-to recipe.  These particular cookies are huge,  I mean seriously honkin’ but you can always make them whatever size you like.  From the brown sugar to the extra yolk and the melted butter, these are some of the richest, most flavorful I’ve ever had.  The recipe calls for semi-sweet chips.  I felt like a big cookie called for a bigger piece of chocolate, so I went with chunks and I think it worked well.  Let’s get down to business so you can go hit the kitchen…like now.

Don't worry - I ate this one.
INGREDIENTS:
2 cups, plus 2 tablespoons All-Purpose flour
½ tsp. baking soda
½ tsp. salt
12 Tbsp. (1 1/2 sticks) unsalted butter, melted and cooled until warm
1 cup packed light or dark brown sugar (I used ½ of each)
½ cup granulated sugar
1 large egg, plus 1 egg yolk
2 tsp. vanilla extract
1-1 ½ cups semisweet chocolate chips
DIRECTIONS:
1. Adjust the oven racks to the upper- and lower-middle positions and heat the oven to 325º.  Line 2 large baking sheets with parchment paper or spray them with nonstick cooking spray.

2. Whisk the flour, baking soda, and salt together in a medium bowl; set aside.

3. Either by hand or with an electric mixer, mix the butter and sugars until thoroughly blended.  Beat in the egg, yolk, and vanilla until combined.  Add the dry ingredients and beat at low speed just until combined.  Stir in the chips to taste.

4. Roll a scant ¼ cup of the dough into a ball.  Hold the dough ball with the fingertips of both hands and pull into 2 equal halves.  Rotate the halves 90 degrees and, with jagged surfaces facing up, join the halves together at their base, again forming a single ball, being careful not to smooth the dough's uneven surface. (I skipped that part and used a ¼ cup cookie scoop)  Place the formed dough balls on the prepared baking sheets, jagged surface up, spacing them 2 ½ inches apart.

5. Bake until the cookies are light golden brown and the outer edges start to harden yet the centers are still soft and puffy, 15 to 18 minutes, rotating the baking sheets front to back and top to bottom halfway through the baking time.  Cool the cookies on the sheets for about 10 min.  Remove the cooled cookies from the baking sheets with a wide metal spatula.

Recipe adapted from Baking Illustrated

Friday, July 11, 2014

Strawberry Rhubarb Crisp Bars - Baking GALS Round 32


Bebopareebop Rhubarb Pie.  Ever heard of it?  How about “Mama’s little baby loves rhubarb, rhubarb…”  Still no?  Ha – well, it’s not surprising.  This little ditty is from Garrison Keillor’s A Prairie Home Companion – a show on NPR my parents would religiously listen to on Saturday evenings.  I don’t remember when I heard it, but it was definitely more than a decade ago (yikes!)…and I think it was only the second time I had ever heard of rhubarb.  The first was on a family vacation in Nova Scotia when my dad’s aunt made a rhubarb pie.  Since I was probably about 10 years old, I’m pretty sure I turned my nose up and didn’t try a bite.  Funny how both of these things have stuck with me though, huh?

Well, now with my much more sophisticated and refined palate (ha!), I have baked with it a few times and so far, liked everything I’ve made.  Rhubarb is such an interesting vegetable.  It looks like and has the consistency of pretty celery, but almost tastes like a really tart apple, and despite its tartness, is almost always used in sweet recipes rather than savory.  This recipe is obviously no exception.  I am on a strawberry rampage this summer, so I was excited to try this – it gave me a chance to take what I know and love and add something less familiar.  By the way, did you know that rhubarb leaves are toxic??  True story.  Remove and discard please!

Anyway, on to the bars.  I have a coworker who likes to try my new recipes so I brought her one for an opinion….to quote her exactly, “Oh my god, I think this is the best thing you’ve ever made.”  WOW – now that’s a bold claim, especially since she’s had my sour cream coffee cake which I swear by.  Not a minute later, she shouted down the hall, “I want these for my birthday!”  Ha, yes maam, done and done.  I’m convinced it was the addition of my go-to secret ingredient (a spice used often in Scandinavian and Indian cuisine).  I add a little to my apple pies too and it totally brings it up a notch.  Perhaps you can figure out what I’m talking about, but if not – well, some things just need to stay a secret. J    

Here are the details and step-by-step pics:

Ingredients:
1 cup rolled oats
3/4 cup, plus up to 2 Tbsp extra all-purpose flour
1/2 cup light brown sugar
Heaped 1/4 tsp table salt
6 Tbsp unsalted butter, melted
1 tsp cornstarch (optional, but helps firm up the filling)
1 Tbsp lemon juice
1 Tbsp granulated sugar
1 cup small-diced rhubarb (from about 1 1/2 medium stalks)
1 cup small-diced strawberries
Secret Spice (optional)
Powdered sugar, for decoration, if desired

Instructions:
Heat oven to 375º. For easy removal, line bottom and two sides of 8-by-8-inch square baking pan with parchment paper. No need to bother (and no greasing needed) if you plan to serve them right in the pan.  This recipe can be doubled and made in a 9x13 pan (this is what I did).


Rinse and chop rhubarb and strawberries into small dice and set aside.

Place oats, 3/4 cup flour, brown sugar and salt in bottom of baking pan and mix. Pour melted butter over, and stir until clumps form. If the clumps feel soft or look overly damp, add the remaining 2 tablespoons flour (I did). Set aside 1/2 cup of the crumble mixture. Press the rest of the crumb mixture evenly in the bottom of the pan.


Sprinkle the fruit evenly with cornstarch, then lemon juice, and 1/2 tablespoon of granulated sugar. Stir to combine.  Spread fruit over crumb mixture evenly.  Scatter reserved crumbs over fruit and bake bars for 30 to 40 minutes (firmer fruits will take longer – mine took almost the full 40), until fruit is bubbly and crisp portion is golden and smells toasty and amazing.


Let cool in pan; I do this in the fridge, where they become crisp once chilled (less so at room temperature). Cut into squares and sprinkle with powdered sugar before serving. Store leftovers in fridge, if they make it that long.


Recipe adapted from Smitten Kitchen

Tuesday, June 10, 2014

Cookies - Me vs. The Machine


Potbelly.  Who would have thought they would be my cookie-baking nemesis?!  I certainly didn’t.  I figured it would be some great artisanal baker, but no.  I’ve heard from several people over the years about how amaaazing their cookies and ice cream-cookie sandwiches are….blah, blah, blah.

Challenge accepted and nemesis no more, my friends.  I think I have finally conquered their most popular cookie – the oatmeal chocolate chip, of course.

Like a true professional, I did my research over time.  I made tweaks to a recipe I already know and love, I tried a couple new recipes from other blogs, I bought a Potbelly cookie and tried to figure out if there was some secret spice I was missing (Anyone see that Friends episode with Monica dissecting what turned out to be a Nestle Tollhouse recipe??  Yup, same.).  I even emailed Potbelly’s customer service and asked them about their recipe.  I’ll get to their response in a sec.  But finally, I got the golden ticket one day when a weekly email from King Arthur Flour showed up in my inbox featuring their version…bingo.  I should have thought to go to them first.

Here is their recipe:

Ingredients
1 cup (2 sticks) unsalted butter, at room temperature
1 cup light brown sugar, packed
1/2 cup granulated sugar
1 large egg, at room temperature
1 large egg yolk, at room temperature
1 tablespoon vanilla extract
2 cups All Purpose Flour
1 cup quick-cooking or old-fashioned oats 
1 teaspoon baking powder
1 teaspoon baking soda
1 teaspoon kosher salt or 3/4 teaspoon regular table salt
3 cups semisweet chocolate chips
Directions
1) Preheat the oven to 325°F. Line several cookie sheets with parchment paper, or lightly grease with non-stick vegetable oil spray.
2) Beat together the butter and sugars until smooth.
3) Add the egg, egg yolk, and vanilla one at a time, beating well after each.
4) Whisk together the flour, oats, baking powder, baking soda, and salt, and add to the butter mixture in the bowl.
5) Mix until everything is thoroughly incorporated. Scrape the bottom and sides of the bowl, and mix briefly.
6) Stir in the chocolate chips.
7) Scoop the dough onto the prepared baking sheets, leaving about 1 1/2" to 2" between cookies.
8) Bake the cookies for 12 to 15 minutes, until they're a light golden brown, with slightly darker edges. Their middles may still look a tiny bit shiny; that's OK, they'll continue to bake as they cool on the pan.
9) Remove the cookies from the oven, and as soon as they're set enough to handle, transfer them to racks to cool.

As good as this recipe is, I still make my own adjustments to get the texture I want – I use jumbo eggs instead of large, I add some extra oats (about 1/2-3/4 cup), perhaps a pinch more baking soda or powder.  I will say that their use of a full tablespoon of vanilla is unique – don’t skimp on that, it makes all the difference.  And whatever you do, make sure its pure vanilla extract and not imitation.  Ick.

As for Potbelly’s customer service response….well first, I checked their website and it just says that a particular recipe is used and they are baked fresh daily.  Ok fine, but I wanted more than that.  I asked if the dough is actually made on sight or if they just get dough that they bake at each location.  I also asked if the recipe was Potbelly’s or from a third party bakery.  The response (which to their credit, I did receive within 24 hours) was, “They are baked fresh each day from dough which is made according to a Potbelly recipe.”  Hmmm, they get kudos for using their own recipe, but this is still vague enough, and I’ve watched enough “How It’s Made” in my day to guess that this dough arrives at each store in big gallon buckets (likely with added sodium and preservatives) and just gets scooped out and plopped onto baking sheets.  Nothing horribly wrong with that I suppose, but for all the hype they get, you’d hope that there’s at least some skill and passion involved.  Next time you get the craving, come to my kitchen instead….to borrow from Seinfeld – admittedly the context is a bit different – they’re real and they’re spectacular!!

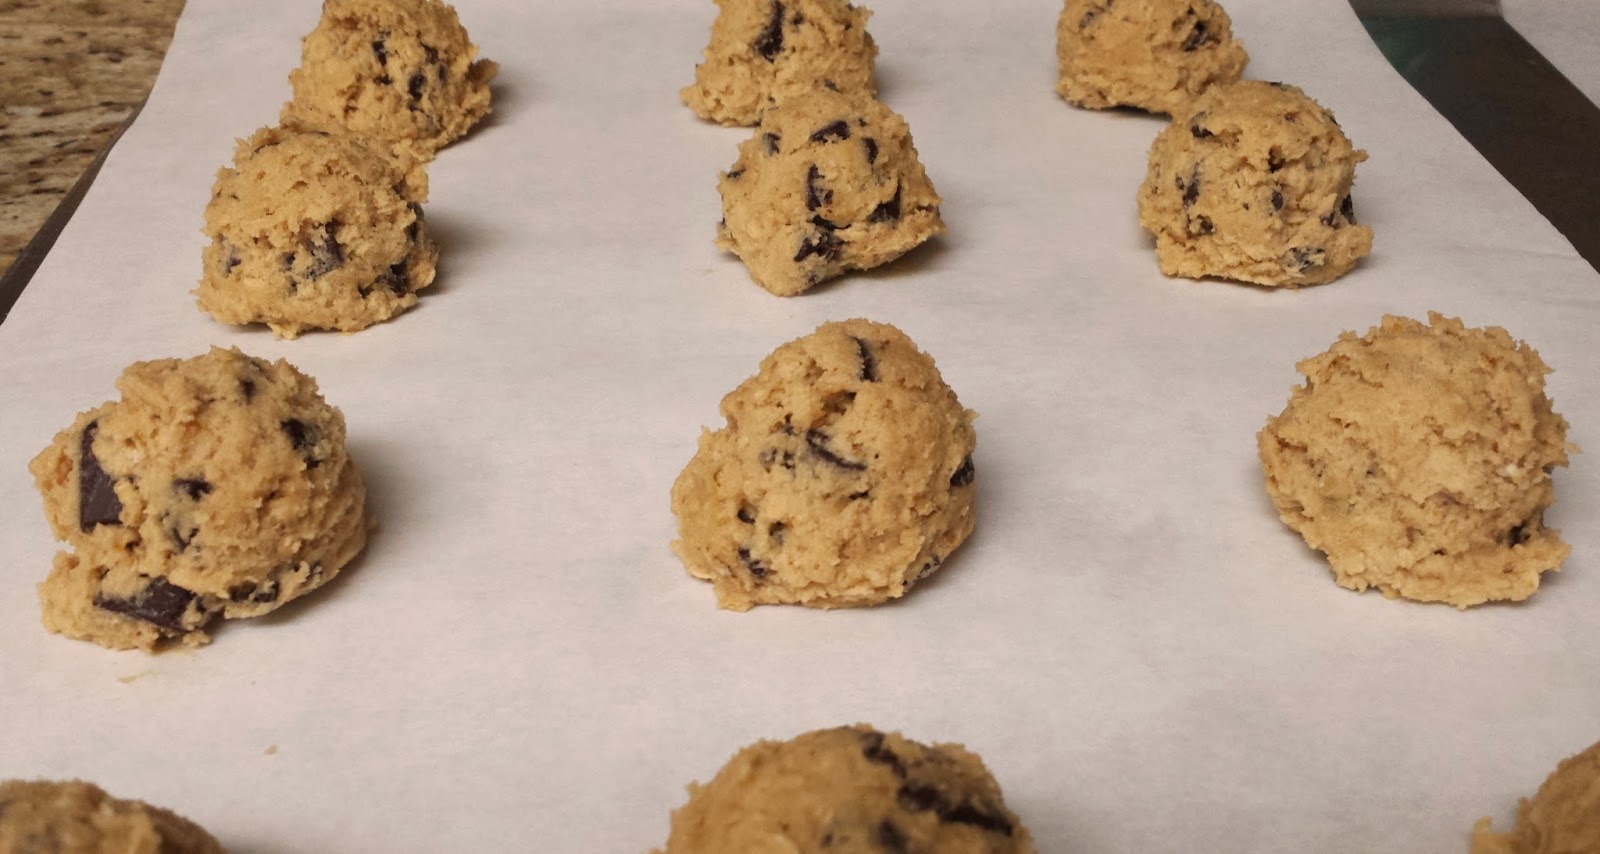
Another batch laying in wait

**Note** – I made these for my Baking GALS Round 31.  While I would love to devour them all myself, I thought it best to get them out of the house immediately and spare my figure.  And no, I did not skip Rounds 29 and 30 – I made repeat cookie and scone recipes the past couple months and therefore didn’t bother boring you with the details.  No worries, the troops were fed!

Sunday, June 8, 2014

Beef (and Snow Peas) - It's What's For Dinner


Recently, on a random Saturday morning, in a Food Network haze, I happened to catch an episode of Pioneer Woman.  She generally makes great looking food but it’s often so heavy and rich I can’t imagine making it unless I’m cooking for a crowd who will ensure no leftovers.  This time though, she made a recipe that looked so simple and supposedly it only took about 20 minutes to whip up…I decided to put it to the test.

Boom.  This dish was as quick as promised – I think the most time consuming part of it was slicing the beef and chopping the ginger.  Otherwise you just toss a few things together and sauté it up.  Dinner in no time, and since that’s pretty much what I have these days, I appreciate that!

What’s even more surprising is that something this fast to make is not at all lacking in flavor.  I added just a pinch of salt, some freshly ground black pepper and a few shakes of garlic powder (in my opinion, almost everything can benefit from garlic).

If you aren’t into snow peas, no problem – I think this would be great with several other vegetables – broccoli or green peppers for example.

I served the beef with quinoa – a pre-seasoned pack of sesame ginger quinoa to be exact.  It was okay, but I quickly remembered why I don’t buy those packets regularly….soooo salty, ugh!  And this is coming from a girl who loves some salt.  I hate to waste food, but I actually trashed the rest of the quinoa and cooked up some plain brown rice to have for next time.  I think it’ll be much better. 

Definitely give it a try – even you non-cooks can handle this one.  The recipe and step-by-step pictures can be found here:    The Pioneer Woman


Wednesday, May 7, 2014

Greek Chicken Salad


So in the event that you are unaware, I am somewhat of a chicken salad queen around these parts.  That’s right.  So much so in fact, last week when a friend sent out a birthday invite, an immediate response from one of the guests was “Will there be chicken salad?”, and I think he was serious. 

I’ve been making the same kind for years.  One I just concocted on my own – it’s a basic recipe but with a couple little twists to give it some extra flair.  Obviously people like my flair as I’ve been asked for the recipe multiple times and finally had to actually think about each step and write it all down.  Seriously…once you’ve had a taste of my salad, you’ll definitely be back for more… 

I’m always on the lookout for new variations to try.  Last year I discovered a recipe for a poppy seed version, which I posted about here.  It’s also quite good.  The almonds add some crunch and the grapes give it a summery sweetness.

But now it’s on to the third!  This recipe was actually for a chicken salad wrap, which just sounded awesome.  I don’t know about you, but sometimes I go through phases of pretty much only wanting sandwiches or wraps, they are just so satisfying – a full meal wrapped up in one package.  However as I’ve mentioned before, I try to keep the carbs at a minimum as summer approaches (beach body, baby!), so I actually ate this over a bed of arugula.  It was delicious as a salad, and I’m sure would be even better as a wrap.  If you like Greek salad, this is a no-brainer, it’s healthy, filling and chock full o’ flavor.


Ingredients
1 (16 oz) can Chick Peas/Garbanzo Beans, drained
¼ cup Italian of Greek dressing (I made my own Greek dressing, see note)
¼ cup Greek yogurt or light sour cream (I used about 1/3 cup plain nonfat Greek yogurt)
1 cup cooked chicken, diced or shredded and cooled (Use 2 cups – its chicken salad!)
½ cup diced cucumber
2 Tbsp diced red onion
1 roma tomato, cored and diced
6 (8 inch) flour tortillas, warmed slightly for easy rolling (optional)
1 cup spinach (or arugula/mixed baby greens)
½ cup feta cheese
6 olives (regular or Kalamata), quartered
*I upped most of the ingredients, especially the chicken – stick with 1 can of beans though.

Instructions
  1. Place half of the garbanzo beans in a large bowl. Gently mash with a potato masher or fork.
  2. Add the remaining garbanzo beans, dressing, yogurt, chicken, cucumber, onion, tomato, feta, and olives to the bowl. Gently stir until well coated and combined.
  3. If using, lay out the tortillas and place some spinach down the center of each.  Place a couple of spoonfuls of the chicken salad mixture in the center of each tortilla on top of the spinach.  Roll tightly and serve.  Otherwise spoon over greens and serve.
Note:  For the Greek dressing, I measured nothing, but here is what I used – red wine vinegar, dried oregano, dried basil, garlic powder, onion powder, Dijon mustard, salt & pepper to taste, and EV olive oil.

Thursday, March 27, 2014

Overthinking, Undersleeping, and Meatballs. Lots of Meatballs.


The blog has taken a hit this year – I haven’t been writing nearly as much and there are several factors at play.  First, I’ve been thinking a lot about my next moves for Bakeri.  The trademark should (knock-on-wood) be going through any day now, and there is potential for my products to be sold at a venue I frequent on the regular, so that would be really cool.  But more details on all of that as I know more…

Next, I’ve been thinking about how I’m going to survive this race.  Ha.  I’ll make it through, of course, but this is definitely one of the biggest physical challenges I've placed on myself, possibly ever.  Well, there was this moment in New Zealand a couple years ago:


But that was quick – it was like, “Ok, are you going to do this or no?  What the f*@!, just do it – it’s New Zealand!!”  And it was amaazzzing.  I’m sure the relay will be as well and I really can’t wait for it, but it has definitely been at least a partial cause of my lack of sleep.  I wake up early and run, then come home from work and go to pilates.  Of course then I still try to be out and about having fun as much as possible – I mean, a lady needs a social life, right?!  And oh yeah, time to cook and bake too.  It’s been rough!  Assuming I manage to keep it all in check, it’s worth every minute of stress and exhaustion. 

All excuses aside though – let’s get to the cooking I did manage to do last weekend…


So who doesn’t love a big tender meatball?  I know this girl certainly does.  And ahem, I’m talking about chicken, people!

Summer’s coming (someday), and like it or not, that means less clothing, which means I start looking for more lean protein, low(er) carb meals.  I’ve made these meatballs a few times now and they have yet to get old.  First you sear them for a good crust, then you bake them in a basic marinara sauce topped with cheese.  The flavor comes mainly from the seasonings in the meatballs themselves, rather than the sauce, and that isn’t always the case with meatball recipes.  It means they taste great when they are first served.  However, the next day when you go back for more, the sauce has seeped into them and added even more flavor…basically you just can’t go wrong with this recipe.


You could definitely use whatever type of ground meat you like, or a mixture, but so far I’ve only used turkey and chicken and I like that they aren’t as heavy as beef.  Also, for added lightness, you could follow my lead and just omit the cream from the sauce altogether.  Sure, it adds richness and mellows out the acidity of the tomatoes, but in my opinion it’s just unnecessary fat and calories.  Other than that, I pretty much stuck to the recipe on this one, with the exception of increasing the herbs and crushed pepper a bit, as well as adding about 1 tsp. of dried oregano to the sauce. 

Of course you can serve these over pasta or as a sub, but if you wish to keep it a “light” meal, I often either eat the meatballs on their own, or over some spaghetti squash, which is a great low carb alternative.   Pick your poison and enjoy! 

Tuesday, March 11, 2014

Oatmeal Triple Chocolate Cookies - Baking GALS Round 28


After almost 2 ½ years of sending baked goods overseas, it’s difficult to come up with something I know will be delicious, but that I haven’t already sent.  I flag tons of recipes to try out, but a lot of them likely wouldn’t survive the shipping (those brownies last month were definitely a risk!).  This time I decided to go with my old trusty White Chocolate Cranberry cookies (Road Cookies) , but with a twist to make them new again…


I omitted the cranberries and instead added both milk and dark chocolate chips to the white.  I left out the nutmeg, but included ¼ tsp of the cinnamon for that warm “Mexican chocolate” touch.  I think they turned out great….in fact, I may make them a new staple on www.bakeridc.com.  I just hope my guy this month likes chocolate!

I have a couple new scone recipes churning in my head – next month I may have to go that route – stay tuned….

*Also, if you feel so inclined, I have a feeling some chopped up bacon would taste absolutely amazing in these!

Friday, February 14, 2014

Dulce de Leche Brownies - Baking GALS Round 27


Grab a spoon.  Yes, a spoon.  These brownies are probably the most chocolaty and decadent, and definitely the gooiest, that I have ever had.  I am generally a brownie purist – no chips, no nuts, no chunks of any kind…however adding a layer of delicious caramel in the middle?  Bring it.

They are in fact so gooey, that I had to remove all the edge pieces first, then use a super thin spatula to even get the others off the parchment paper without them completely just falling apart into a big blob of goo.  Not that that would be a bad thing if I was just eating them myself, but I had to ship these out!  I am just crossing my fingers that they arrive in Afghanistan in some semblance of the proper brownie shape.  I did forewarn the recipient that he may just need to attack them with a spoon….preferably with a scoop of vanilla ice cream.

For those who may not be familiar with dulce de leche, it is basically just caramel, but made a little differently – you can make it by boiling a can of sweetened condensed milk for several hours (and hours and hours).  Open the can, and voilà – caramel!  However, I took the easy route and found this in the Latin/Hispanic section at the grocery store.


These may be a mess (and maybe I used more caramel than I should have – oops!), but they are a mess that is 110% worth it.  Make them - you can thank me later.

*You could always try with this pan too – maybe that would help: Edge Brownie Pan


Recipe from Brown Eyed Baker (www.browneyedbaker.com)
INGREDIENTS:
1¼ cups all-purpose flour
1 teaspoon salt
2 tablespoons dark unsweetened cocoa powder
11 ounces dark chocolate, coarsely chopped (I used dark chocolate chips)
1 cup unsalted butter, cut into 1-inch cubes
1½ cups granulated sugar
½ cup light brown sugar
5 eggs, at room temperature
2 teaspoons vanilla extract
¾ cup dulce de leche
INSTRUCTIONS:
1. Preheat oven to 350 degrees F. Butter the sides and bottom of a glass or light-colored metal 9x13-inch pan. Line the bottom with a sheet of parchment paper, and butter the parchment; set aside.

2. In a medium bowl, whisk together the flour, salt and cocoa powder; set aside.

3. Place the chocolate and butter in the bowl of a double boiler set over a pan of simmering water, and stir occasionally until the chocolate and butter are completely melted and combined. Turn off the heat, but keep the bowl over the water of the double boiler, and add both sugars. Whisk until completely combined and remove the bowl from the pan. The mixture should be at room temperature.

4. Add three eggs to the chocolate mixture and whisk until just combined. Add the remaining eggs and whisk until just combined. Add the vanilla and stir until combined. Do not overbeat the batter at this stage, or your brownies will be cakey.

5. Sprinkle the flour mixture over the chocolate. Using a spatula, fold the dry ingredients into the wet ingredients until there is just a trace amount of the flour mixture still visible.

6. Pour half of the brownie mixture into the pan and smooth the top with a spatula. Drizzle about ¾ cup of the dulce de leche over the brownie layer in a zigzag pattern, making sure the dulce de leche doesn't come in contact with the edges of the pan or it will burn. Use an offset spatula to spread the dulce de leche evenly across the brownie layer, leaving about a ½-inch border around the edges. In heaping spoonfuls, scoop the rest of the brownie batter over the caramel layer. Smooth the brownie batter gently to cover the dulce de leche layer.

7. Bake the brownies for 30 minutes, rotating the pan halfway through the baking time, and check to make sure the brownies are completely done by sticking a toothpick into the center of the pan. The brownies are done when the toothpick comes out with a few moist crumbs. Remove the brownies from the oven and place the pan on a wire rack; allow to cool completely to room temperature before cutting and serving. The brownies can be stored, tight wrapped at room temperature, for up to 4 days.

Wednesday, January 29, 2014

O Canada (Again) and Happy 100th!!


First and foremost, it’s time to applaud the 100th post on my blog!  Whoot whoot!  To celebrate, I went to Canada and ate a lot.  Ha.  Not really, but the timing matches up….  Anyway, thanks to all 1, 2 or come on, perhaps maybe 3?? of you avid readers.  I truly appreciate every single second you spend reading, or even just taking a gander, at my little corner of the internet.  Over the past few years, when I’ve gone out to a new restaurant, or I’ve cooked after work to blow off steam,  when I’ve been off traveling (and therefore eating a ton), or just have taken to the kitchen on a lazy Sunday, sitting down and writing my posts has brought me such gratification.  It’s therapeutic for me and I hope there’s a least one person who has enjoyed each entry.  A couple stats before diving into my latest Canadian adventure…not too shabby:

Total pageviews:  8,865
Most popular recipe post:  Ma! The Meatloaf! – 11/21/11
Least popular recipe post:  Homemade Falafel & Yogurt Sauce – 6/7/11
Most popular restaurant review:  Thai X-ing – 10/23/12
Least popular restaurant review:  Dinner with Spike – 6/22/10
Top 10 countries reached in the last month:
United States, Russia, China, Germany, India, Canada, Australia, France, Ukraine, Netherlands

Ok – where to begin on Montreal…  From bagels to poutine to an amazing steak – I definitely ate very well.  But first, have you ever been there?  I hadn’t, though I’d been talking about it with friends for years.  It’s so easy to get to – a quick 1.5 hour flight from DCA and you’re in a mini-Paris.  Paris without the attitude (seriously, everyone can agree that Canadians are some of the nicest, right?).  Quebec is a French-speaking state, though 99% of the people we encountered all spoke nearly perfect English as well.  I highly recommend a trip North, but wait until summer…our 22 degree day with steady snow was the warmest, by about 30 degrees!

Despite the cold, we still managed to pack a lot into a long weekend.  We ate at a fancy restaurant, went to a museum, checked out some of the hot new bars, ate the famous smoked meat, ate both of the famous bagels (Montreal Bagels), shopped in the underground city, and of course, took in a hockey game.  In between all of that we had café au laits and drank wine, wine and more wine.  It was a blast and I can’t wait to go back.  I’ll let the pictures tell the rest of the story.

This is a must try - great ambiance, amazing food! Joe Beef

Famous Bagels - Part 1

Famous Bagels - Part 2 (try the pesto cream cheese!)

Adorable cafe where we warmed up with a couple bottles of wine!

French Onion Soup - always hits the spot

Cheese and Fruit Plate - to go with the wine, of course!

Famous Smoked Meat and home of Montreal Steak Seasoning!

Mmmm, beefy.
Poutine - obvi.

Notre Dame Basilica

Actual ruins of the Old City in the basement of the Archaeological Museum

More ruins

Wintry street scene that struck me...

And of course I took in a Canadiens game!

Live well, love well and eat well, my friends.  Skål! Santé! L’chaim! Salud! Prost! CHEERS!

And don’t forget to check out Bakeri too:  www.bakeridc.com